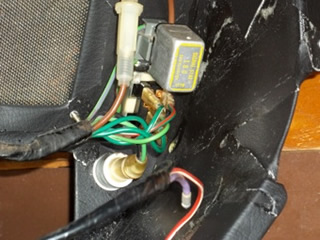
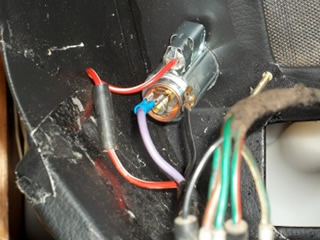
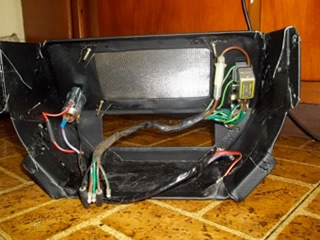
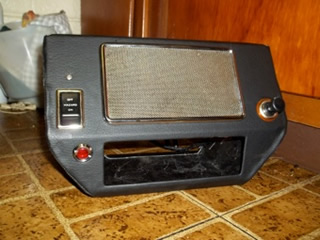
This radio console box was in use for a long time. Moss USA sells new ones under part number 453-810 and says that they were in use from 1966-1980. The one they sell is a one size fits all kind of thing which means that holes for the hazard warning switch, hazard indicator light, cigarette lighter etc are not provided. Over the years these holes moved around a bit some were added others deleted. . . maybe worst of all is that the wiring harness for the radio box, and lots of the hardware needed is NLA. This left me hunting for an original box for my particular year. Fortunately, I lucked out and found the right box at a swap meet that included all the right parts and even a BL Motorola radio! The original speaker was included and was connected to the radio with one male and one female spade connector. The speaker itself measured about 4 1/2" by 6 3/4".
I then had one of two options. i could have purchased the moss motors box and used my box as a guide to cut the holes out and as a donor for parts, but I figured that since I already had the box and it had only a little rust,m it was worth saving. First I carefully removed all the trim and the parts from the box. Then I carefully pealed off the vinyl. Using a seam ripper I separated the vinyl cover into its three pieces. Surface rust had formed in places where it appeared water had collected. principally in the front corners and under the vinyl. The next step was to soak it in evapo-rust overnight. This was followed by using Aircraft Remover to strip off any remaining paint and a few coats coat of zinc rich primer. I finished it off in a few coats of black spray paint. Of course the box wasn't finished yet because while metal was back to a near factory new condition, I needed to make a new vinyl cover for it.
The fabric used is a fabric backed vinyl available from nearly any Jo-Ann Fabrics. Bring in a sample of your old material and compare it to what they have until you find a close match. While you're there pick up a leather needle for your sewing machine. The needle that came with your sewing machine wont work. At home you can trace out the pieces on the fabric side, but don't trace where the holes are going to be, and leave plenty of extra on the top and rear edges to trim and stretch over the metal later. Cut out the pieces, and pin it together. The front lower corners will be very tricky to pin and to stitch. In the factory they would have machine sewed it so even though my wife was willing to stitch it together by hand I insisted on something closer to the factory specs. I bought a Singer Promise sewing machine from Target during the black friday sale. It took a little practice to figure out how to thread the machine and how to stitch a straight line. Once I figured it out it wasn't too hard. You may want to seek advice from someone who knows how to use a sewing machine well for this part of the project though.
Next its time to glue the cover on. I used headliner and carpet adhesive (permatex item number 27828) that I bought from Autozone. The stuff works great but it is hard to stretch the vinyl over the metal box with this applied. It may be best to flip the cover inside out and center it on the front of the box and then carefully work it right side out again, sliding the sides down over the metal. Once its on, you're ready to cut out the holes (on the speaker hole and the radio hole leave flaps that can be folded over and glued to the metal), reassemble all the parts and trim onto the box. I resulted in a console that won't win any awards (my stitched seams look awful) but it will be good for a nice driver and I have plenty of vinyl to try again with.