
In my opinion, a vintage or factory radio is a wonderful finishing touch to any interior. However living with these old radios has limitations. When our spridgets were new, FM either hadn't been invented yet or was not nearly as popular as it is today. The popularity of 8-tracks waxed and waned. Cassettes and CDs would have been just coming into existence by the end of MG Midget production, but while in car cassette decks may have been a plausible but expensive option, in car CD players would have to wait another 20 years.
An iPod would have been little more than an idea if that. Many of us have a portable audio source (CD player, mp3 player, portable radio etc.) that would be desirable to play through the cars built in speakers. Some solutions may already exist in some cases. For example, if your car has an FM radio, you can buy an FM transmitter that will transmit music from any source to a specific set of FM radio frequencies your radio can pick up. The problem is that such a device can be interrupted by interference and if you have an an AM radio you're out of luck. It is always preferable anyway to have a direct connection to the radio's amplifier. I suppose you could go out and buy a more modern radio, but since the parts needed to do this simple modification cost less than 10 bucks (including wire), this solution is more cost effective.
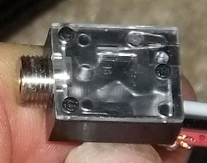
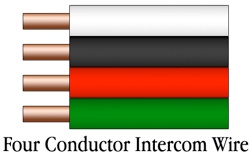
The easiest way is to add a 1/8" closed circuit phone jack somewhere on the radio box. The closed circuit feature eliminates the need for a separate switch to select the input jack or the radio. To keep things extra neat and tidy, some 4 conductor intercom wire may be your best bet to hook it all up. This depends on where you plan on putting the jack since this type of wire is not shielded and so you shouldn't use it if you plan to mount the jack too far from the radio. Intercom wire is what I used and so far have not noticed any interference. I use it here (in the colors shown) for clarity. Of course you really only need three conductor wire (for mono), so I just tore off the green wire.

Obviously you will need to find out where best to inject the audio signal. The safest place to do this is on the volume control pot (potentiometer or variable resister). The reason being that the audio signal always travels through the pot before the amplifier. On every pot there are three leads, top, wiper, and ground. The wiper is always in the middle. If you're lucky the pot will be exactly as shown at right. Sometimes top and ground are reversed. Ideally, the connection should be made to the top and ground as this will preserve the function of the volume control when something is plugged into the jack. Since most Spridgets use a mono radio, I will assume thats what you have.
To do this right, you will need a 12V DC power source. I used my battery charger set to normal automotive, start, and 15A 12V Auto, and I then connected the alligator clips to the positive and the ground respectively. Remove the top cover from the radio, connect it to a speaker, an antenna, and to power and check that it works properly. Plug in your soldering iron to get it nice and hot. Next find some line source of audio signal. By that I mean either from a headphone jack or line out RCA or 1/4" jack, DO NOT use speaker outputs as the level coming from a power amp will probably ruin your radio.
You will also need an old audio cable (preferably mono) that you don't mind destroying or is missing a connector. The idea is that you will connect your cable to the source on one end, and have bare wires on the other end that you can touch to the pot and ground on the radio to see if you can hear anything. If you are using a stereo cable you will need to touch the braided shield of one channel to ground on the radio (that would be the metal case of the radio) and one of the wire cores to the middle terminal on the pot with sound playing through the cable, and the radio turned on with the volume knob turned about halfway up. Some audio cables shield each channel separately like in a pair of headphones. Other stereo cables have the two channels and only one shield. This will work either way. the main point is to make sure you are actually getting sound from the source into the radio. Me I used an old RCA cable i previously used to connect RCA outs on my home 8 Track deck to a pair of speakers. This worked great since it had bare wires on one end. I hooked it into my computer with a USB audio adapter.
If you hear your music, try touching the shield to ground and a core wire to the top terminal of the pot. As mentioned before, this can be actually on top or it can be down below, so experiment and see which works best. If that works too, great, then you can use the volume control knob on the radio and you cut the wire off the top terminal on the pot and make your connection there. If not, the only way to get music into the radio is into the middle terminal (cut the wire off this terminal instead of the top one in this case), and you won't be able to use your volume control knob (except for the radio).

On the left is a schematic of the 1/8" jack I bought at Radio Shack (I used Radio Shack Part number 274-0246). There is a schematic on the back of the package too but I label it here since theirs doesn't label the L+R channels. If you have a stereo radio this might help you. If not, connect terminals 3+4 with a short length of wire (solder all connections). You will also need to connect terminals 2 and 5, and while it is possible to connect these with a short wire, I have been told that it is best practice to use a pair of resistors (I tried both and both ways sounded fine to my ears). Solder a 1/4 watt 10K Ohm resister to each terminal and then solder the two resistors together.
Now take a length of your 3 conductor wire (long enough to go from the radio to wherever you want the jack to be) and solder the black wire to terminal one on the jack, the white wire to the spot where the two resistors meet (or terminal 5 if you omitted the resistors), and the red wire to terminal 3. Find a hole in the side of the radio you can route the wire through and route it to the volume pot.

Now solder the black wire to a spot on the metal case of the radio, and the white wire to the terminal on the pot you found works best. Finally, after slipping a short length of heat shrink insulation tubing over the wire you cut off the terminal, solder the red wire to the wire you cut, cover with the heat shrink tubing and carefully shrink it with your soldering iron or a heat gun. With that done, its time to test out your new input jack.
Get an audio cable with a 1/8" male phone plug on each end and connect your new input jack to the headphone jack of any audio device (such as a CD player, laptop, mp3 player etc) and play some music. Preferably pick some music track that you know has some stereo effects (I used Eve Of Destruction by Barry McGuire) Turn your radio on and if you hear the music your audio device is playing, then unplug the cable from your new input jack and see if you hear the radio.
If not, check to make sure that everything is connected properly and that all the solder joints are sound. Good solder joints are especially important with the connections between the terminals you bridged. If the connections aren't strong you may only hear the left channel or the right channel and not a combined mono track. This is why it is crucial to test it out with a track that has noticable stereo effects. Playing "Eve Of Destruction" with bad solder joints on the jack resulted in hearing Barry's lead vocals only half the time since in the stereo version of the song, the lead vocal alternates being fully left channel to fully right channel. If you reversed the red and white wire, you wont hear any music (or it might be very very faint and "echoy" such that you have to turn the volume all the way up to hear it at all) when you plug the cable in, but the radio should work. Be careful when you solder to these tiny terminals. Too much heat and you melt the jack and cause the terminal to come loose. To little heat and you have a weak cold solder joint.
 |
 |
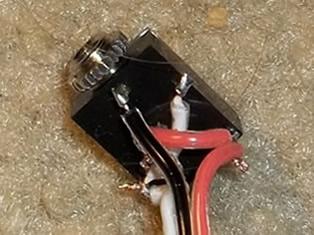 |
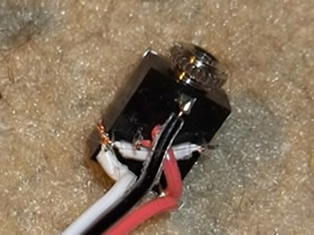 |
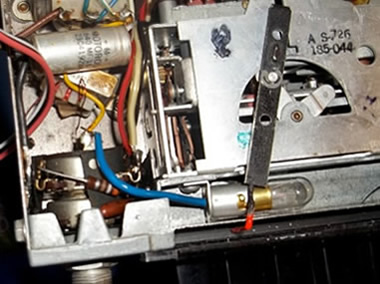
Phone Jack with terminals jumpered (not recommended)
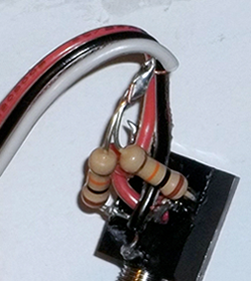 |
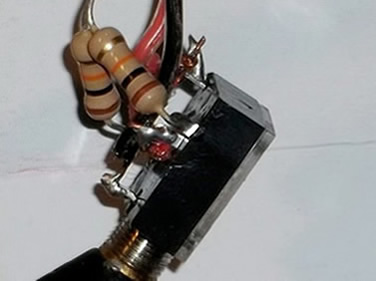 |
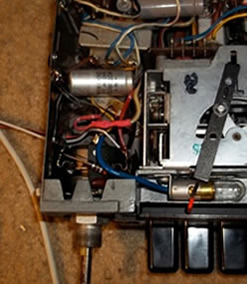
Phone Jack with terminals 3+4 jumpered and 2+5 summed through resistors (recommended)
Once you are sure everything works as it should, install the radio into the radio console as per factory instructions. Next determine where you would like to put the jack. I chose a spot that is easily accessible, not terribly visible, and is not likely to be hit by anyone's knee (passenger side 1" from the top of the console box and about halfway in from the front). When you figure out where you want it, drill a 1/4" hole from the outside in (never from the inside out). If you picked a spot that has some vinyl fabric on the inside as well as the outside, peal off and remove any vinyl from the inside of the box in that spot since you wont be able to thread the nut on the jack if it is left in place. Then carefully route the jack  and the wire to the spot, put the jack in the hole and tighten the nut. Test once more to make sure everything works, and if it does, go ahead and install it in the car. Once in the car check to see if you hear any unwanted noise. The best way to do that is to put the top down, plug in your CD or mp3 player or whatever, select your favorite track and go for a drive.
-Seth Jones 6/28/2011