
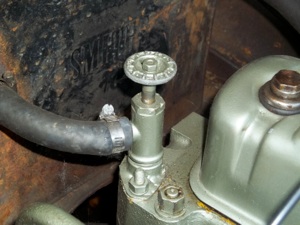
While the idea was probably a cost saving measure, to me it is a quirky and endearing feature that I have grown to love to have to live with. A-series engined spridgets all lack any in cabin method to control air temperature coming through the vents. The only thing that may be controlled from inside the cockpit is wether the fan is on or off, wether the fresh air intake is open or closed, and wether the foot vents are open or closed. If one wishes to turn the heat on or off it can only be done using what some have called "a smurf sized spigot" on the back of the engine. I really like these valves. Only problem is that the early types are not available new and the rubber o-ring in them can degrade and allow coolant to seep out the top of the valve. At least twice in the past month I have run across questions on how to rebuild it.

There are many types used through the years. According to Moss all of these apparently have the same part number. However searching through the 1968 factory service parts lists, I found four part numbers, ACA5455, AHA8323, 17H1631, and 17H1634 (the last two were superceeded by ACA5455 and AHA8323). It does not, however, give any changeover points. The February 1977 parts list is a bit less helpful. It gives one part number and a changeover point. 88G588 for engines produced before 12H1293, CHA 349 and 12H3868. As time went on one part number replaced all [previous ones, and no one kept track of changeover points because any of them can work on any engine. All A-series heater valves (aka heater taps) are be interchangeable. Some have a top that is threaded in and these are easily rebuilt in a similar manner to that shown here. There was a period during 1275 production at least where the valve was press fit together and is difficult if not impossible to dismantle and rebuild. So far as I can tell, all types of valves were manufactured by Smiths and I suppose the factory used whatever was available at the time. If thats so, it may be hard determine exactly what is the original type for your year. Pay close attention to resources like "Original Sprite and Midget" and sales brochures. That way you may at least be able to make an educated guess.
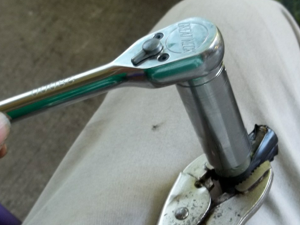
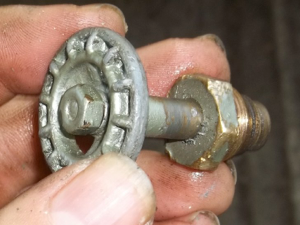
Begin by removing the knob. To do this unscrew the nut with a 5/16 wrench. It should come off very easily. Under the nut is a lock washer. The knob isn't even press fitted on and will come off easily once the nut and lock washer are off. You must now disconnect the hose, and use a 18mm deep socket to unscrew the whole thing at once (yes it really is metric). There is an adapter plate that bolts to the cylinder head, but since the valve body screws into this, just ignore that its even there for now.
Now remove the top from the valve. This unscrews with the same 18mm deep socket and some degree of elbow grease. You will need to place the body of the valve in a bench vice with some soft wood like pine between the valve and the jaws of the vice (or you can use vice grips in the field just be warned that you will probably scratch it up that way).
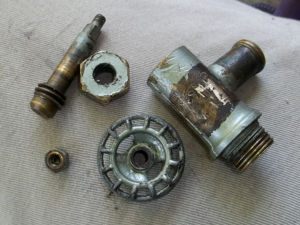
The spindle of the valve is not held in the top piece by anything other than the friction of the o-ring sandwiched between the spindle and the top piece. Just gently press the spindle down through the bottom of the top piece. If you like you can use the knob to twist the spindle and help it along.
The o-ring itself is in a groove inside the top piece. Get this out anyway you can (knife, nail, awl, whatever works best for you) take the o-ring (or what's left of it), the top piece and the spindle to your local hardware store and look for an o-ring in the plumbing section that most closely matches the dimensions of the old one. You can get away with one that is a little too fat 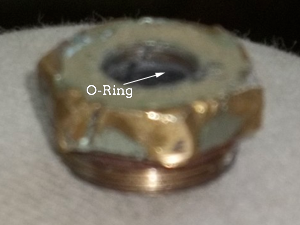 (installation could be a little rough at first) but try to find one that fits nice and snug around the spindle and isn't loose in the grove. Now head to the front counter (pick up an ice cream on the way if thats your thing) and pay the 30 cents or so for your replacement part (and pay for the ice cream), and go home (eating your ice cream on the way).
Back in your garage, fit the o-ring inside the groove of the top piece, and press the spindle back in. It probably will take a bit of effort but that's a good thing. As long as you don't tear it to pieces and picked the right o-ring it should mean that it will seal up nicely when its back on the car. Next screw the top piece back onto the body with the 18mm deep socket (get it real good and tight), screw the valve back onto the car, reconnect the hose, top up the coolant (yes you will have lost some in doing this project but I'm sure you knew that), start the engine, check for leaks, and bleed the coolant system.
The following are examples of the press fit top used on some versions of this valve
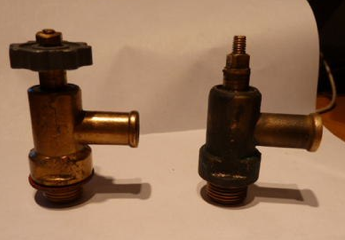
-Seth Jones 7/8/2011