
I developed a coolant leak at an autocross on Sept. 7 2014. It was weeping coolant from the vicinity of the water pump, so I figured it was time to replace it and do a brief article on how to do it. The images shown are from my 1971 and as such it includes the original smog equipment and a cross flow radiator. Earlier cars will follow a very similar procedure and so will later cars with alternators.
The first step is to drain the cooling system. Some cars may have a petcock or plug somewhere like on the metal cross tube below and to the rear of a cross flow radiator, or on the back of the engine. If you're like me and you aren't so lucky, this is best accomplished by sticking a very large drain pan under where the lower radiator hose joins the cross tube (or where the lower hose joins the radiator on down flow radiators) and disconnect the hose at that point. This will make a huge mess but it is effective and some times those drain plugs or petcocks wont move. Disconnect all hoses from the radiator. 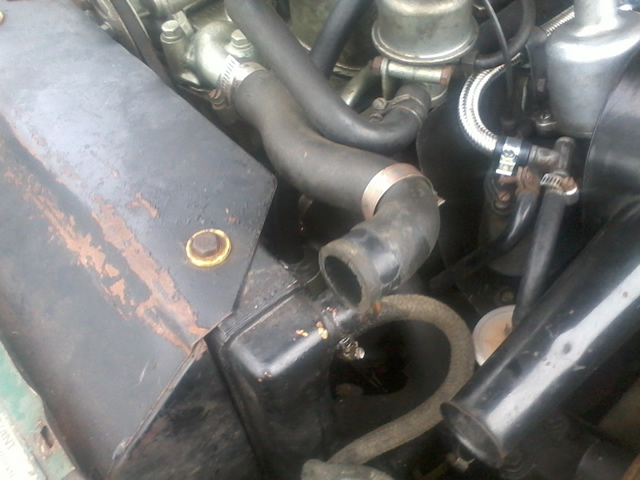
Next undo the bolts holding the radiator to the upright radiator supports on either side of the radiator shroud (or down flow radiator). For cross flow radiators also remove the screws and/or bolts holding the radiator to the front cowl. Your radiator and shroud should now pull free. This will give you room to remove the water pump. If your car was smog equipped and still has the factory smog equipment, loosen the bolts holding the air pump onto the thermostat housing as well as the bolts on the adjusting link. Push the pump down to slacken off the air pump belt and remove the belt. Do the same for the alternator or generator and remove the fan belt. Some bolts can be tricky to get to with the air pump in place, so it may be easier to get to the generator or alternator bolts with the air pump removed. You will need to unbolt the adjuster from the adjuster link bracket as well as remove the bolt holding the front of the generator or alternator onto the water pump.
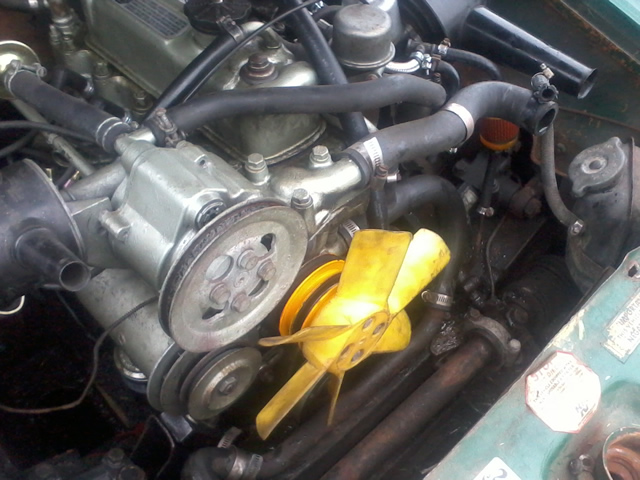
Next remove the four bolts holding the fan and pulley onto the water pump. On earlier cars this would be a two pice four bladed steel fan, but later cars like mine came with a six bladed plastic fan. All cars have four bolts here and I believe that they are removed with a 7/16" socket. I used an electric impact and a long extension through the front valence.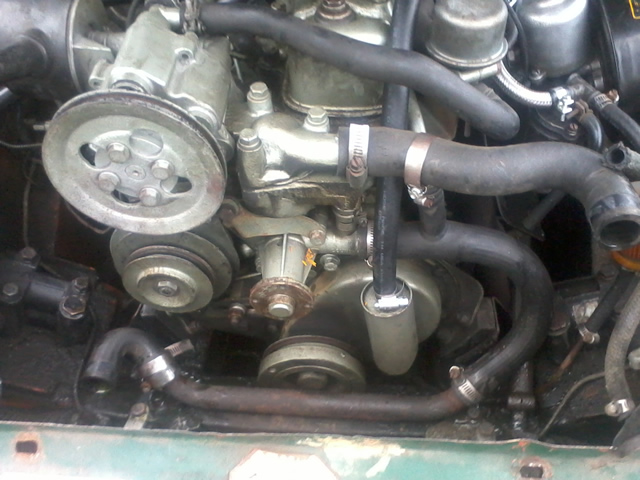
There are 4 bolts that hold the water pump onto the engine block, one bolt that holds the alternator or generator onto the water pump and the top two water pump bolts also hold the adjusting mink bracket for the air pump. Hopefully all you have left by now are the four bolts that hold the water pump to the block. Remember that the two long bolts must go in on the drivers side above and below the connection to the lower radiator hose.
Loosen the hose clamps holding the bypass hose to the water pump. At this point all that is holding the water pump on is the gasket and friction from the locating pins. Pry it off taking care not to damage the alternator, the air pump, the carburettors or any fuel, emission, or coolant lines. On some cars it may be helpful to disconnect the engine breather hose from the oil separator cannister. The picture below shows the lower hose still attached but this may be disconnected before you remove the water pump.
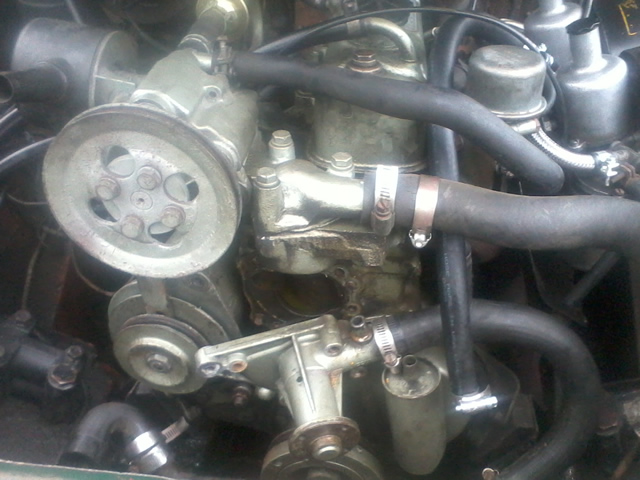
Clean the gasket off the block, installing the water pump is the reverse of installation. Once its all back together, fill the radiator with coolant, bleed the coolant system, get it up to normal temperature and check for leaks as you go making sure that all the hose clamps are nice and tight. Also since the replacement of the bypass hose from the water pump to the block is notoriously difficult, now is the time to replace it.